This simple dress pattern is something that I choose as one of the suggestions for my Sew a Dress class at Hello Stitch in Berkeley. (scheduled again for Sun. July 30 - the first one was great fun. More details at the bottom of this post on all the upcoming classes). As it happens Craftsy asked me to write a longer post outlining all the steps to sew a simple dress, consequently I decided to sew up this pattern and get a lot of things done with one project. Plus I've been on a shift dress kick lately. They are such simple and pleasant things to wear. Since it was 107˚F in the SHADE here yesterday I would rather have worn a dress made of ice cubes but since that is not going to happen a shift dress it is.
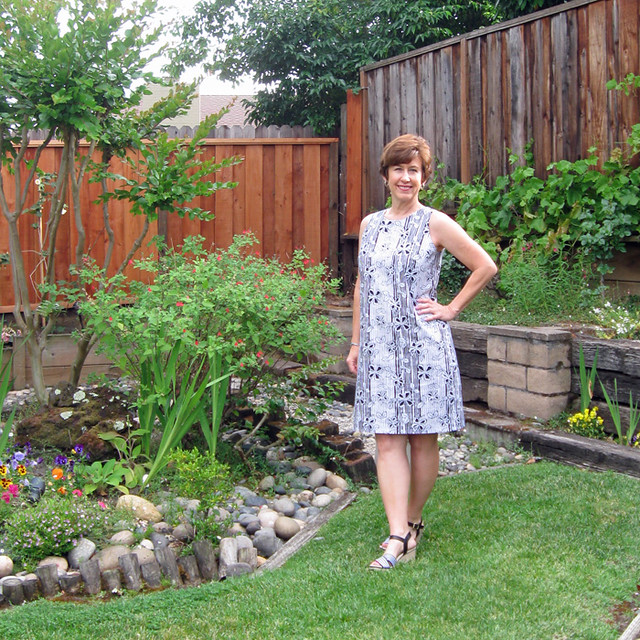
I have had this fabric in my stash for a good 5 or 6 years. It's a cotton batik that I bought in Hawaii, quite a large amount (5 yards) and just never found a use for it. Slightly heavy as a lot of batiks are, so not really good for most dresses plus the vertical stripe had me stumped. I think I found the perfect style for it that uses the stripe best. Plus I can wear my striped navy blue espadrille sandals - double win.
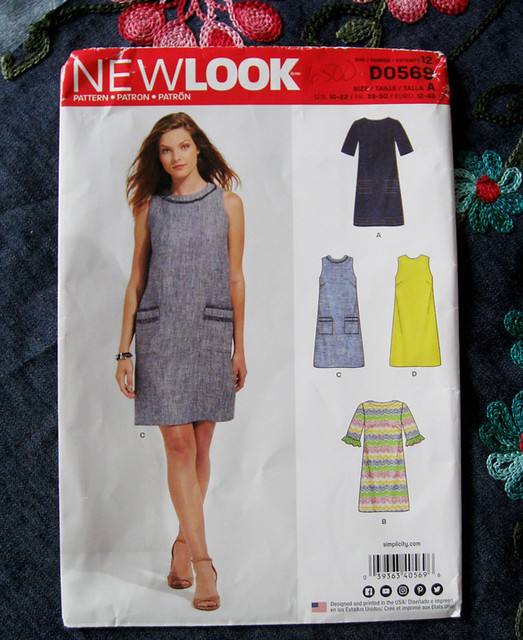
Here's the pattern envelope, with a sneak peek of a subsequent version of this dress. Which everyone has gone wild for on my Instagram teases, embroidered denim must be the thing this summer. The envelope says D0569 but all the pattern pieces say New Look 6500 so I'm calling it that. I really like New Look patterns, they come up with some super cute dresses and tops, plus they include all sizes in one envelope and cost $ 3.99 all the time.
Onward to my adjustments: I sewed this dress for the Craftsy post, not as a wearable but as a "photograph-able" item, i.e. something that would really show in the step-by-step tutorial but I had no intention of wearing it. It was actually quite a pleasure to just sew up a dress with no changes, I sewed the size 12 and went from there.
Here is the version I sewed for Craftsy, in a quilting cotton that I had in my stash, I think a remainder from a project I did for someone on Etsy ages ago. And I really loathe this color of green so don't even tell me that you like this dress on me :) Plus for the most part sewing/wearing garments with quilting cotton is a big NO for me. With some exceptions they always look a bit off: too wrinkly, too juvenile, too unsophisticated to claim my interest.
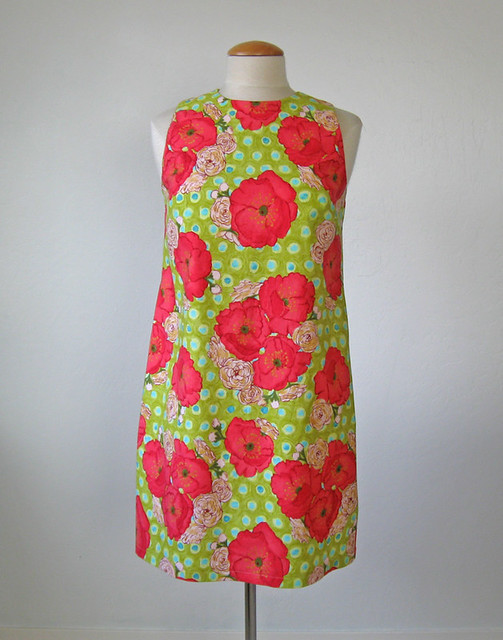
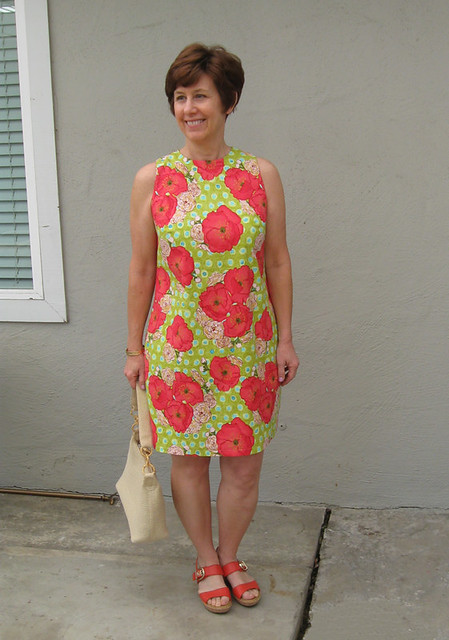
But I include the photo of me wearing this one to show the neckline fit. That neckline was choking me - I don't like that high round neckline and when you move your head forward it's so uncomfortable. Good shoe match thought, right?
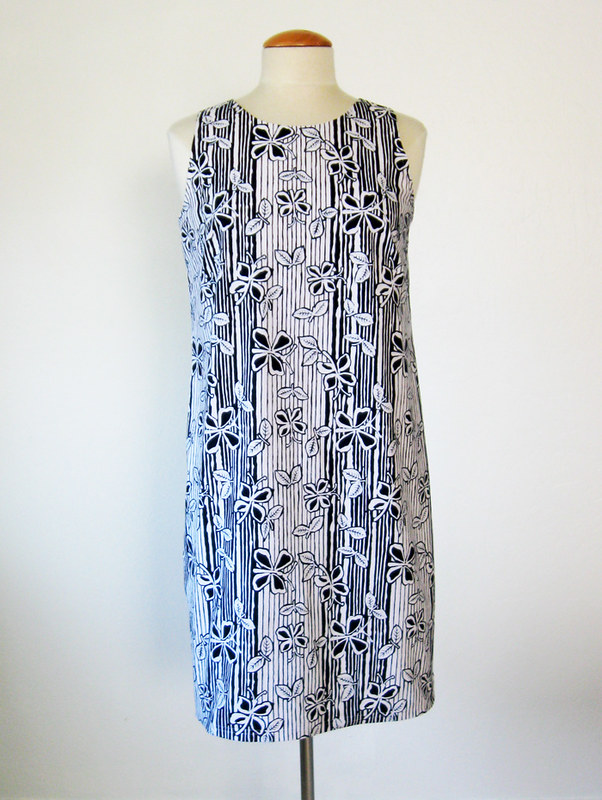
Back to the blue and white batik version. Can you see the difference in the neckline? It is so much more comfortable for me in the second version. I wanted to figure out exactly how much to open the neck so I made a version of just the top half of the dress in swedish tracing paper - and every time I use that I remember that is has absolutely no give. While it seems like a good idea because you can sew it - putting it on is not so easy. I did put a zipper so I could actually try it on - which worked in the end but it was kind of shredded. However it was good enough to slice and dice a bit, figuring out how I wanted the final neckline to be shaped.
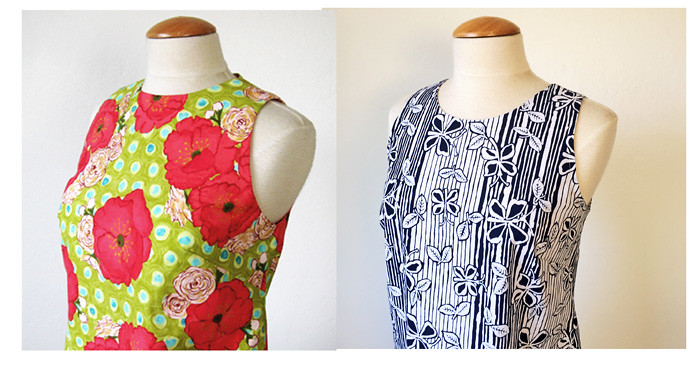
I cut out the batik version based on my new neckline, and basted it together at the shoulder seams to see if I liked the neckline. It still seemed a bit too high for my preference and also I like the armholes to be more cut in at the shoulder in a sleeveless dress. So instead of cutting more off the edges of the dress I made a one piece facing for front and back, and then used tracing paper to mark a seam line. At the neck I took away a further 5/8" (total seam allowance now 1.25") and then on the armholes I think I sewed it at around 7/8" which makes the armhole a bit bigger all around. You have to be careful that it doesn't make the armhole too low but this dress had a very tight armhole so there was plenty of room.
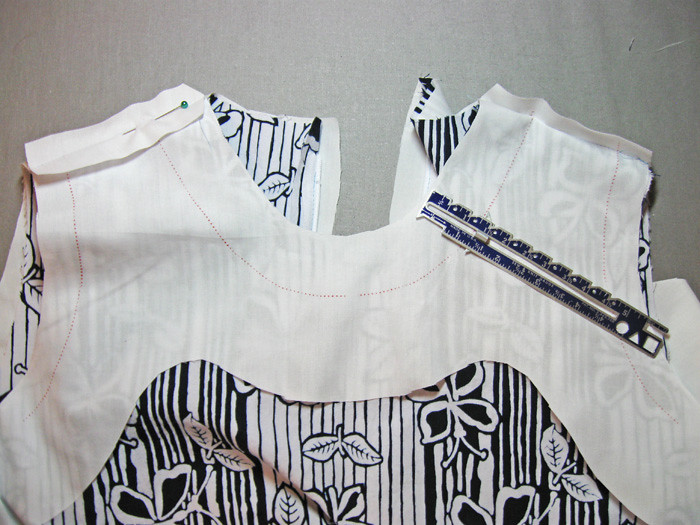
On my next version of this dress (the embroidered chambray fabric) I'll show how I make the one piece facing plus this upcoming version is lined so it incorporates facing and lining together.
The original New Look pattern had separate neck and armhole facings which works ok, not my preference but not as horrible as some make it out to be. But there's a better way. Another option for these simple summer dresses is bias binding but I wanted to show the traditional or basic type of dress sewing.
But we are not done yet! In fact this adjustment should have come up first in my writing but I only remembered to take this picture a few minutes ago and include it. The bust dart on this dress is both large and high. I measured it on the pattern piece and could see that it needed to be lower so I did that before I did anything else, just a straightforward shift downward about 3/4". The bust dart is kind of larger than it would be had there been other darts (vertical waist darts) or other shaping. Trying it on it made the dart a bit too pointy - not my favorite look. So I reduced the width of the dart.
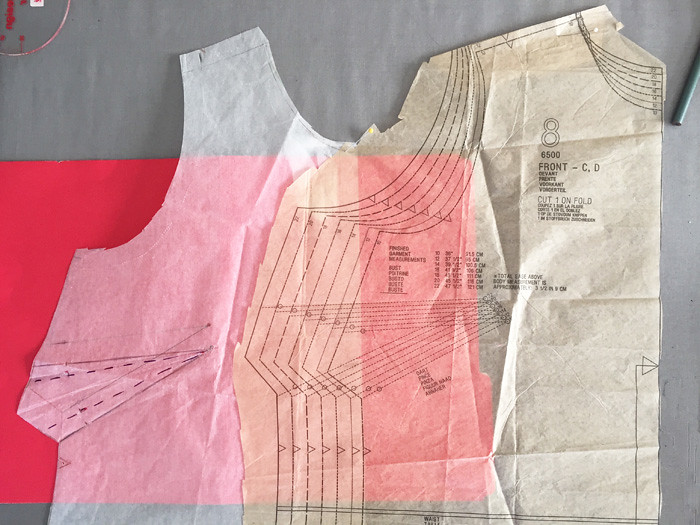
On the tracing paper on the left you can see the faint outline of the original dart, too high. The second placement, lower but too big, and then the final version in the purple dotted line, just right. I sound like Goldilocks don't I but if you're going to do adjustments you might as well go all the way until you like the fit.
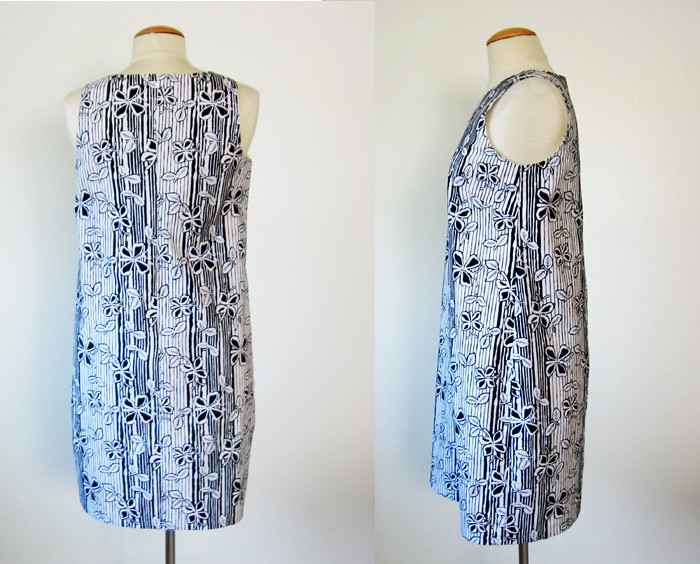
Back and side view, you can barely see the dart but that is the ideal, at least for me. Since the side seams were not even in length I split the difference at the top of the seam at the armhole and sliced off about 3/8" off the side back at that point. Worked out fine.
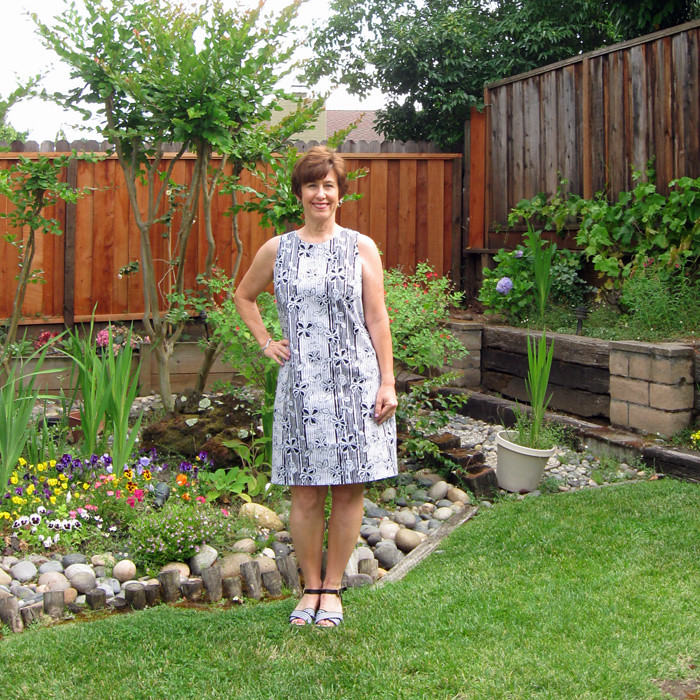
So that's chapter one on my summer shift dress extravaganza. I have some more complex things in line for my sewing table but not sure what order I will sew them.
Here's the link to that Craftsy post: The Complete Beginners Guide to Sewing a Dress.
Update on classes at Hello Stitch Studio on Berkeley. The Fit Lab was great - we are going to schedule this class again soon. In July we are repeating Saturday classes for sewing Skirts, Tunic Tops, and a new one starting on Wed 7/26 in the evening is a Button-front shirt class. All these classes are two sessions scheduled a week apart so not a long term time commitment and you will get a project done (or nearly) and learn some new and useful techniques. The Dress class is an all-day one on Sun. 7/30. FYI: I've found parking to be surprisingly easy around the studio and it is no more than a 10 minute walk from the Berkeley Bart station so really convenient to get to.
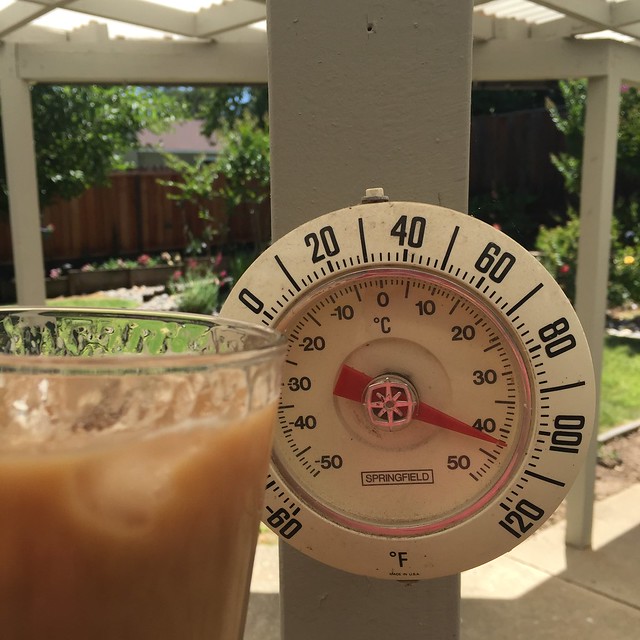
This was yesterday afternoon. Survival mode with an iced coffee. thankfully lots cooler today (ha ha only mid 90's˚F).
Happy weekend sewing,
Beth
today's garden photo, this white daisy just looks so calm and cool, even in this heat!



0 Yorumlar